Shaw Spam Filter Settings | Gmail Spam Filter Settings (and Telus Webmail) | Yahoo Mail Spam Filter Settings
1. Spam Settings on Shaw
Adjusting spam settings
Through Webmail you are able to adjust your spam mail options. These options include discarding messages immediately so they will not appear in your trash folder, labeling messages as spam and leaving them in your inbox, or labeling spam messages and moving them to the junk folder. To adjust your spam mail options:
- Go to https://webmail.shaw.ca
- Log in using your email address and password.
- Click Preferences and select Spam.
- Select a spam mail option:
- Label message as spam and keep in Inbox
- Discard message immediately (will not appear in trash)
- Label message as spam and send to Junk)
- Click Save at the top left of the page.

Creating an email filter
Filters in Shaw Webmail allow you to automatically file your messages into folders, delete unwanted emails received from specific email addresses, forward emails that meet specific criteria, and flag, tag, or mark as read any emails from a specific email address. You can also create filters that affect your outgoing mail.
- Go to https://webmail.shaw.ca
- Log in using your email address and password.
- Click Preferences and select Filters
- Click either the Incoming Message Filters or Outgoing Message Filters tab.
- Select Create Filter. The Add Filter window will open.
- Enter a name for the filter.
- Select Any or All from the first dropdown list.
- In the second dropdown list, select a type of filter (eg. Subject, From, Contains).
- Configure the conditions that should trigger your filter (eg. Subject / contains / special offer)
- You can click the + button to add another condition to the same filter
- You can click the – button next to any conditions you want to remove
If you set multiple conditions for a filter, the Any or All settings in Step 7 will come into play. Any will cause the email to be filtered if any condition is met. All will cause the email to be filtered only if every condition is met.

To set what happens if filter conditions are met:
- Under Perform the following actions, click the dropbox list and select:
- Keep in Inbox to keep the email in your inbox.
- Delete to skip the Trash folder and delete the item permanently.
- Move into Folder to specify a folder where the email should be sorted.
- Tag with to categorize an email by creating and adding tags.
- Mark as to mark an email as Read or Flagged.
- Redirect to address to have the email forward to another email address.
- Click OK to create the filter.
Deleting messages from a specific sender
A common use of email filters is to delete unwanted emails from a specific email address. It’s important to follow these instructions carefully, so you don’t inadvertently filter all of your email to the Spam or Trash folders.
- Go to https://webmail.shaw.ca
- Log in using your email address and password.
- Click Preferences and select Filters.
- Stay on the Incoming Message Filters tab.
- Select Create Filter. The Add Filter window will open.
- Enter a name for the filter.
- Select Any from the first dropdown list.
- In the second dropdown list, select From.
- In the text box that appears, enter an email address.
- Under Perform the following actions, select Delete from the dropdown list.
In the final step, you could choose to filter emails to the Spam or Trash folders so you can review them before deleting the email.

2. Spam Settings on Gmail
https://support.google.com/mail/answer/1366858
Unmark Spam in Gmail
You can unmark emails as spam. Gmail also automatically identifies spam and other suspicious emails and sends them to Spam.
You can remove an email from Spam if you incorrectly marked it as spam:
- On your computer, open Gmail.
- On the left, click More.
- Click Spam.
- Open the email.
- At the top, click Not spam.

Tip: To stop a message from being sent to Spam in the future, you can:
Add, move, or import contacts
You can save names, email addresses, phone numbers, and more in Google Contacts.
https://support.google.com/contacts/answer/1069522#zippy=%2Cfrom-a-file%2Cfrom-a-gmail-account
Add a contact
- On your computer, go to Google Contacts.
- At the top left, click Create contact.
- Click Create a contact or Create multiple contacts.
- Enter the contact’s information.
- Click Save.
Import contacts
- On your computer, go to Google Contacts.
- On the left, click Import
.
- Click Select File.
- Choose your file.
- Click Import.
Step 1: Export existing Gmail contacts
- On your computer, go to Google Contacts
- At the top right, click Export
.
- Select which contacts to export.
- Select Google CSV.
- Click Export.
- At the top right, click your profile picture
Sign out.
Step 2: Import the file
- On your computer, go to Google Contacts, then sign in with your other Gmail account.
- On the left, click Import
- Click Select File.
- Choose your file.
- Click Import.
Create rules to filter your emails
You can manage your incoming mail using Gmail’s filters to send email to a label, or archive, delete, star, or automatically forward your mail.
https://support.google.com/mail/answer/6579
On your computer, you can manage your incoming mail using Gmail’s filters to send email to a label, or archive, delete, star, or automatically forward your mail.
Create a filter
- Open Gmail.
- In the search box at the top, click Show search options
.
- Enter your search criteria. If you want to check that your search worked correctly, see what emails show up by clicking Search.
- At the bottom of the search window, click Create filter.
- Choose what you’d like the filter to do.
- Click Create filter.
Note: When you create a filter to forward messages, only new messages will be affected. Additionally, when someone replies to a message you’ve filtered, the reply will only be filtered if it meets the same search criteria.
Use a particular message to create a filter
- Open Gmail.
- Check the checkbox next to the email you want.
- Click More
.
- Click Filter messages like these.
- Enter your filter criteria.
- Click Create filter.
Edit or delete filters
- Open Gmail.
- At the top right, click Settings
- Click Filters and Blocked Addresses.
- Find the filter you’d like to change.
- Click Edit or Delete to remove the filter. If you’re editing the filter, click Continue when you’re done editing.
- Click Update filter or OK.
Export or import filters
If you have a backup of your filters, you can import the filters in Gmail. You can also export your filters.
- Open Gmail.
- At the top right, click Settings
- Click Filters and Blocked Addresses.
- Check the box next to the filter.
- At the bottom of the page, click Import filters.
- Choose the file with the filter you’d like to import.
- Click Open file.
- Click Create filters.
- At the bottom of the page, click Export.
- This will give you a .xml file, which you can edit in a text editor if you’d like.
3. Spam Settings on Yahoo Mail
https://help.yahoo.com/kb/SLN28056.html
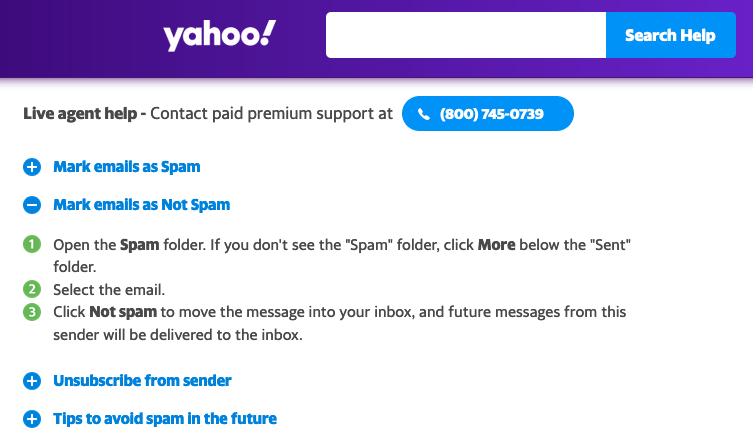
To prevent messages from being put into the “Spam” folder, follow the instructions below.
- Open the Spam folder. If you don’t see the “Spam” folder, click More below the “Sent” folder.
- Select the email.
- Click Not spam to move the message into your inbox, and future messages from this sender will be delivered to the inbox.